Behind the Scenes: Rolleiflex 2.8fx+
My name is Alexander Veledzimovich and I live in Belarus. For the last 12 years, I have worked with photography (commercial and art projects).
I started to work with Blender on 1 December 2019. Before that, I had used 2D vector editors to make simple logos and sprites for low-poly games.
All my training from that moment consisted of reading the Blender manual, following 43 tutorials from different sources, and modeling every day. Use Kaizen (small steps strategy) and maybe you can fly. 🙂
My global inspiration comes from Blender Artists, ArtStation, and my passion for making virtual worlds.
Inspiration and Motivation
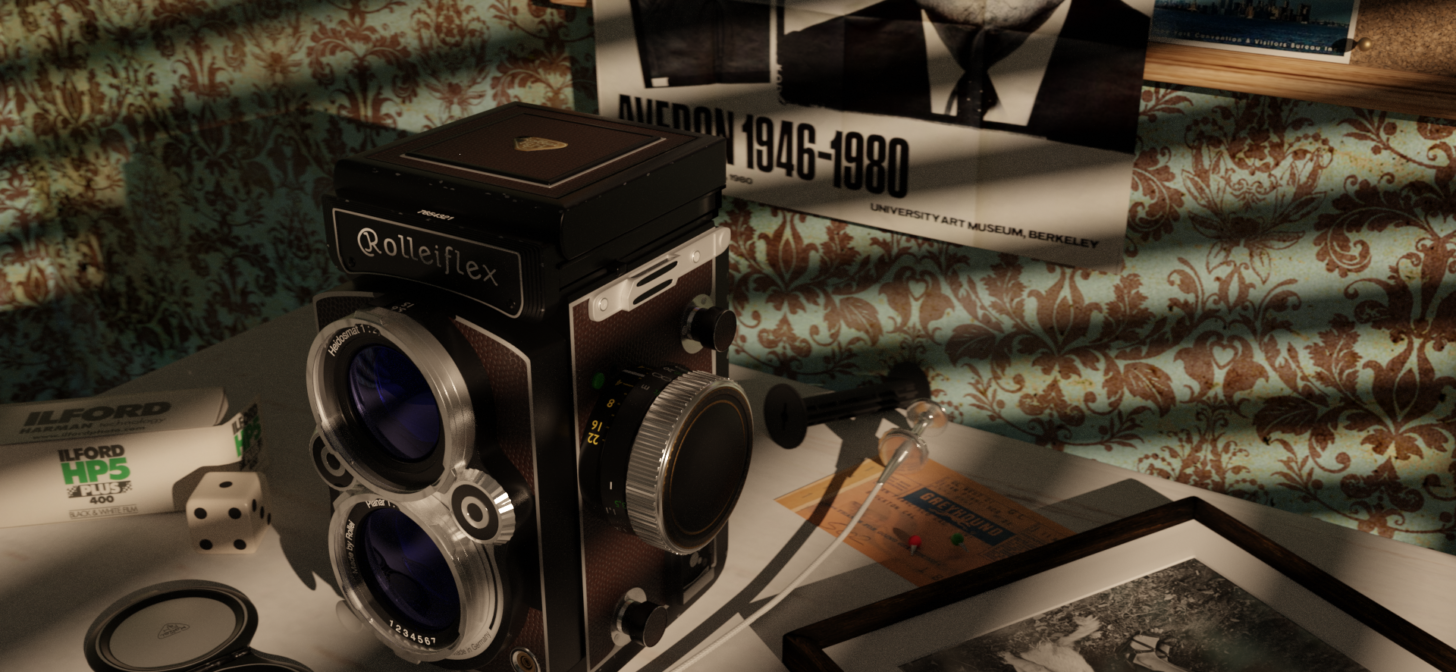
In this scene, you can see part of my photograph which I took with an older model of Rolleiflex 2.8C. I used this camera mostly for portraits and the Rolleiflex Fx+ for color shots.
I can explain the difference in lens coating and so on, but we are speaking about 3D modeling and not about photography. 🙂
I just wanted to connect photography and 3D modeling as a sort of ritual, to start my portfolio with something that belongs to the other part of my life.
A couple of months ago I saw this work by IagoMendez and was impressed by its mood, light, and documentary style. But at the stage I was at, I couldn’t imagine that I could start my personal scene with so many details.
iago mendez 3d art
Nostalgia by Iago Mendez
Tools
I used Blender 2.8 together with the default Preview app for OS X. For this model, I tried to avoid Photoshop in order to simplify the process and focus on Blender features.
I rendered the model on my old Mac mini 2.3 GHz Intel Core i7 8 GB DDR3 and Intel HD Graphics 4000 1536 MB. It is not a perfect machine. I can set render sampling to 1024 with the Cycles engine.
Process
This project gave me an opportunity to improve my skills. There were a lot of technical gaps that I needed to fill. I’ll just tell you about a couple of them.
First of all, I made many mistakes with topology. And when I tried to use a Smooth shader and Subdivision surface, I saw that very quickly. I needed to fix the errors, which gave me a real understanding of how important “squares” are and showed me that holes in surfaces are sometimes not such easy things.
I had worked with Text in Blender only on flat surfaces. But here I learned how to put them on curved planes with the Shrinkwrap modifier.
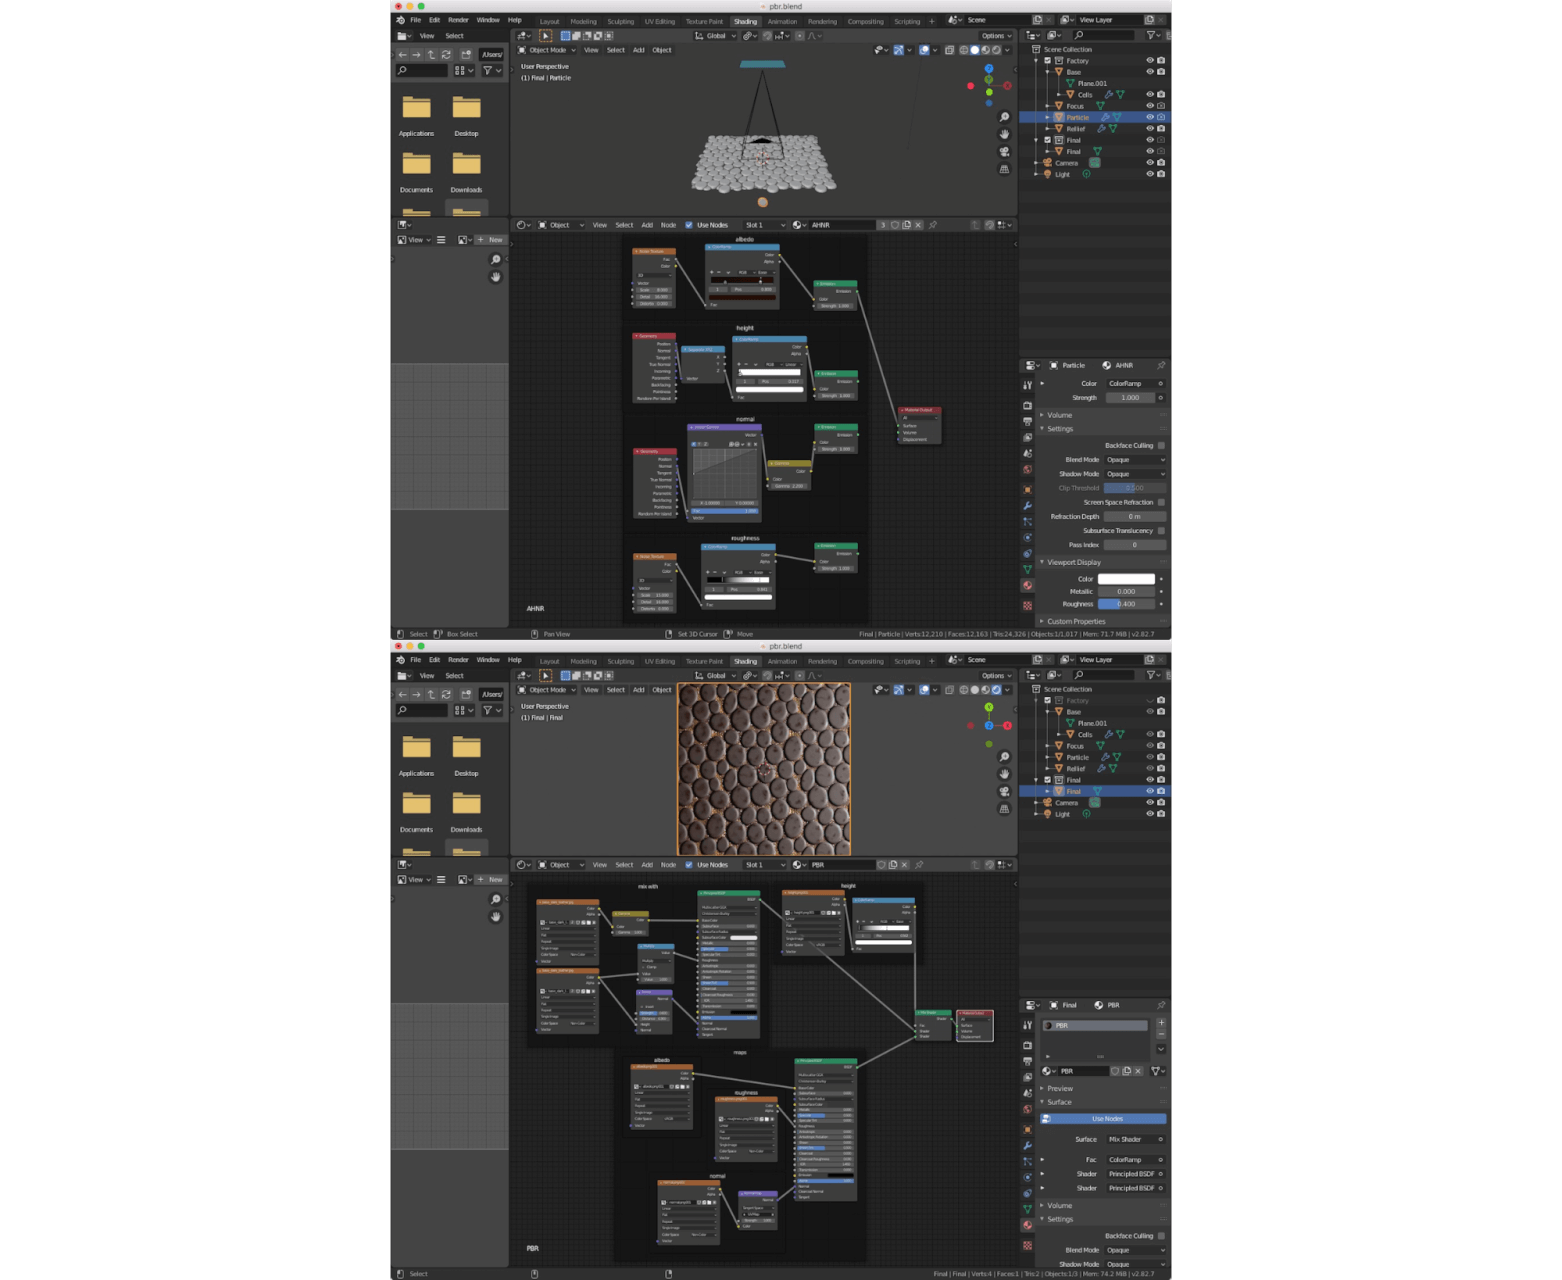
I started to reuse some techniques. I made a Blender file with a “factory” that could be used to produce PBR (physically-based rendering) textures because I couldn’t achieve a good texture for Rolleiflex “skin”. Now I can produce different textures just by changing the basic model and a small piece that is used as a parent object for particles.
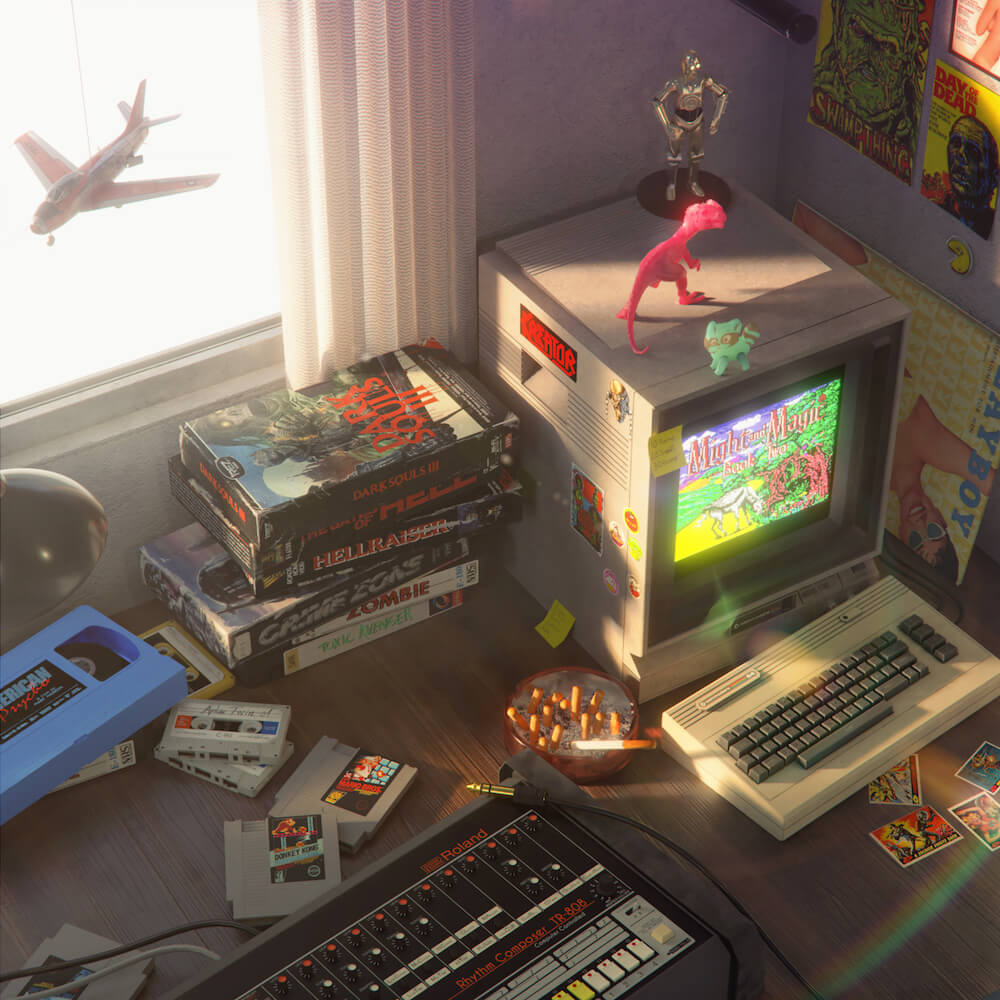
And the last thing. The devil is in the details. Just compare the two images.
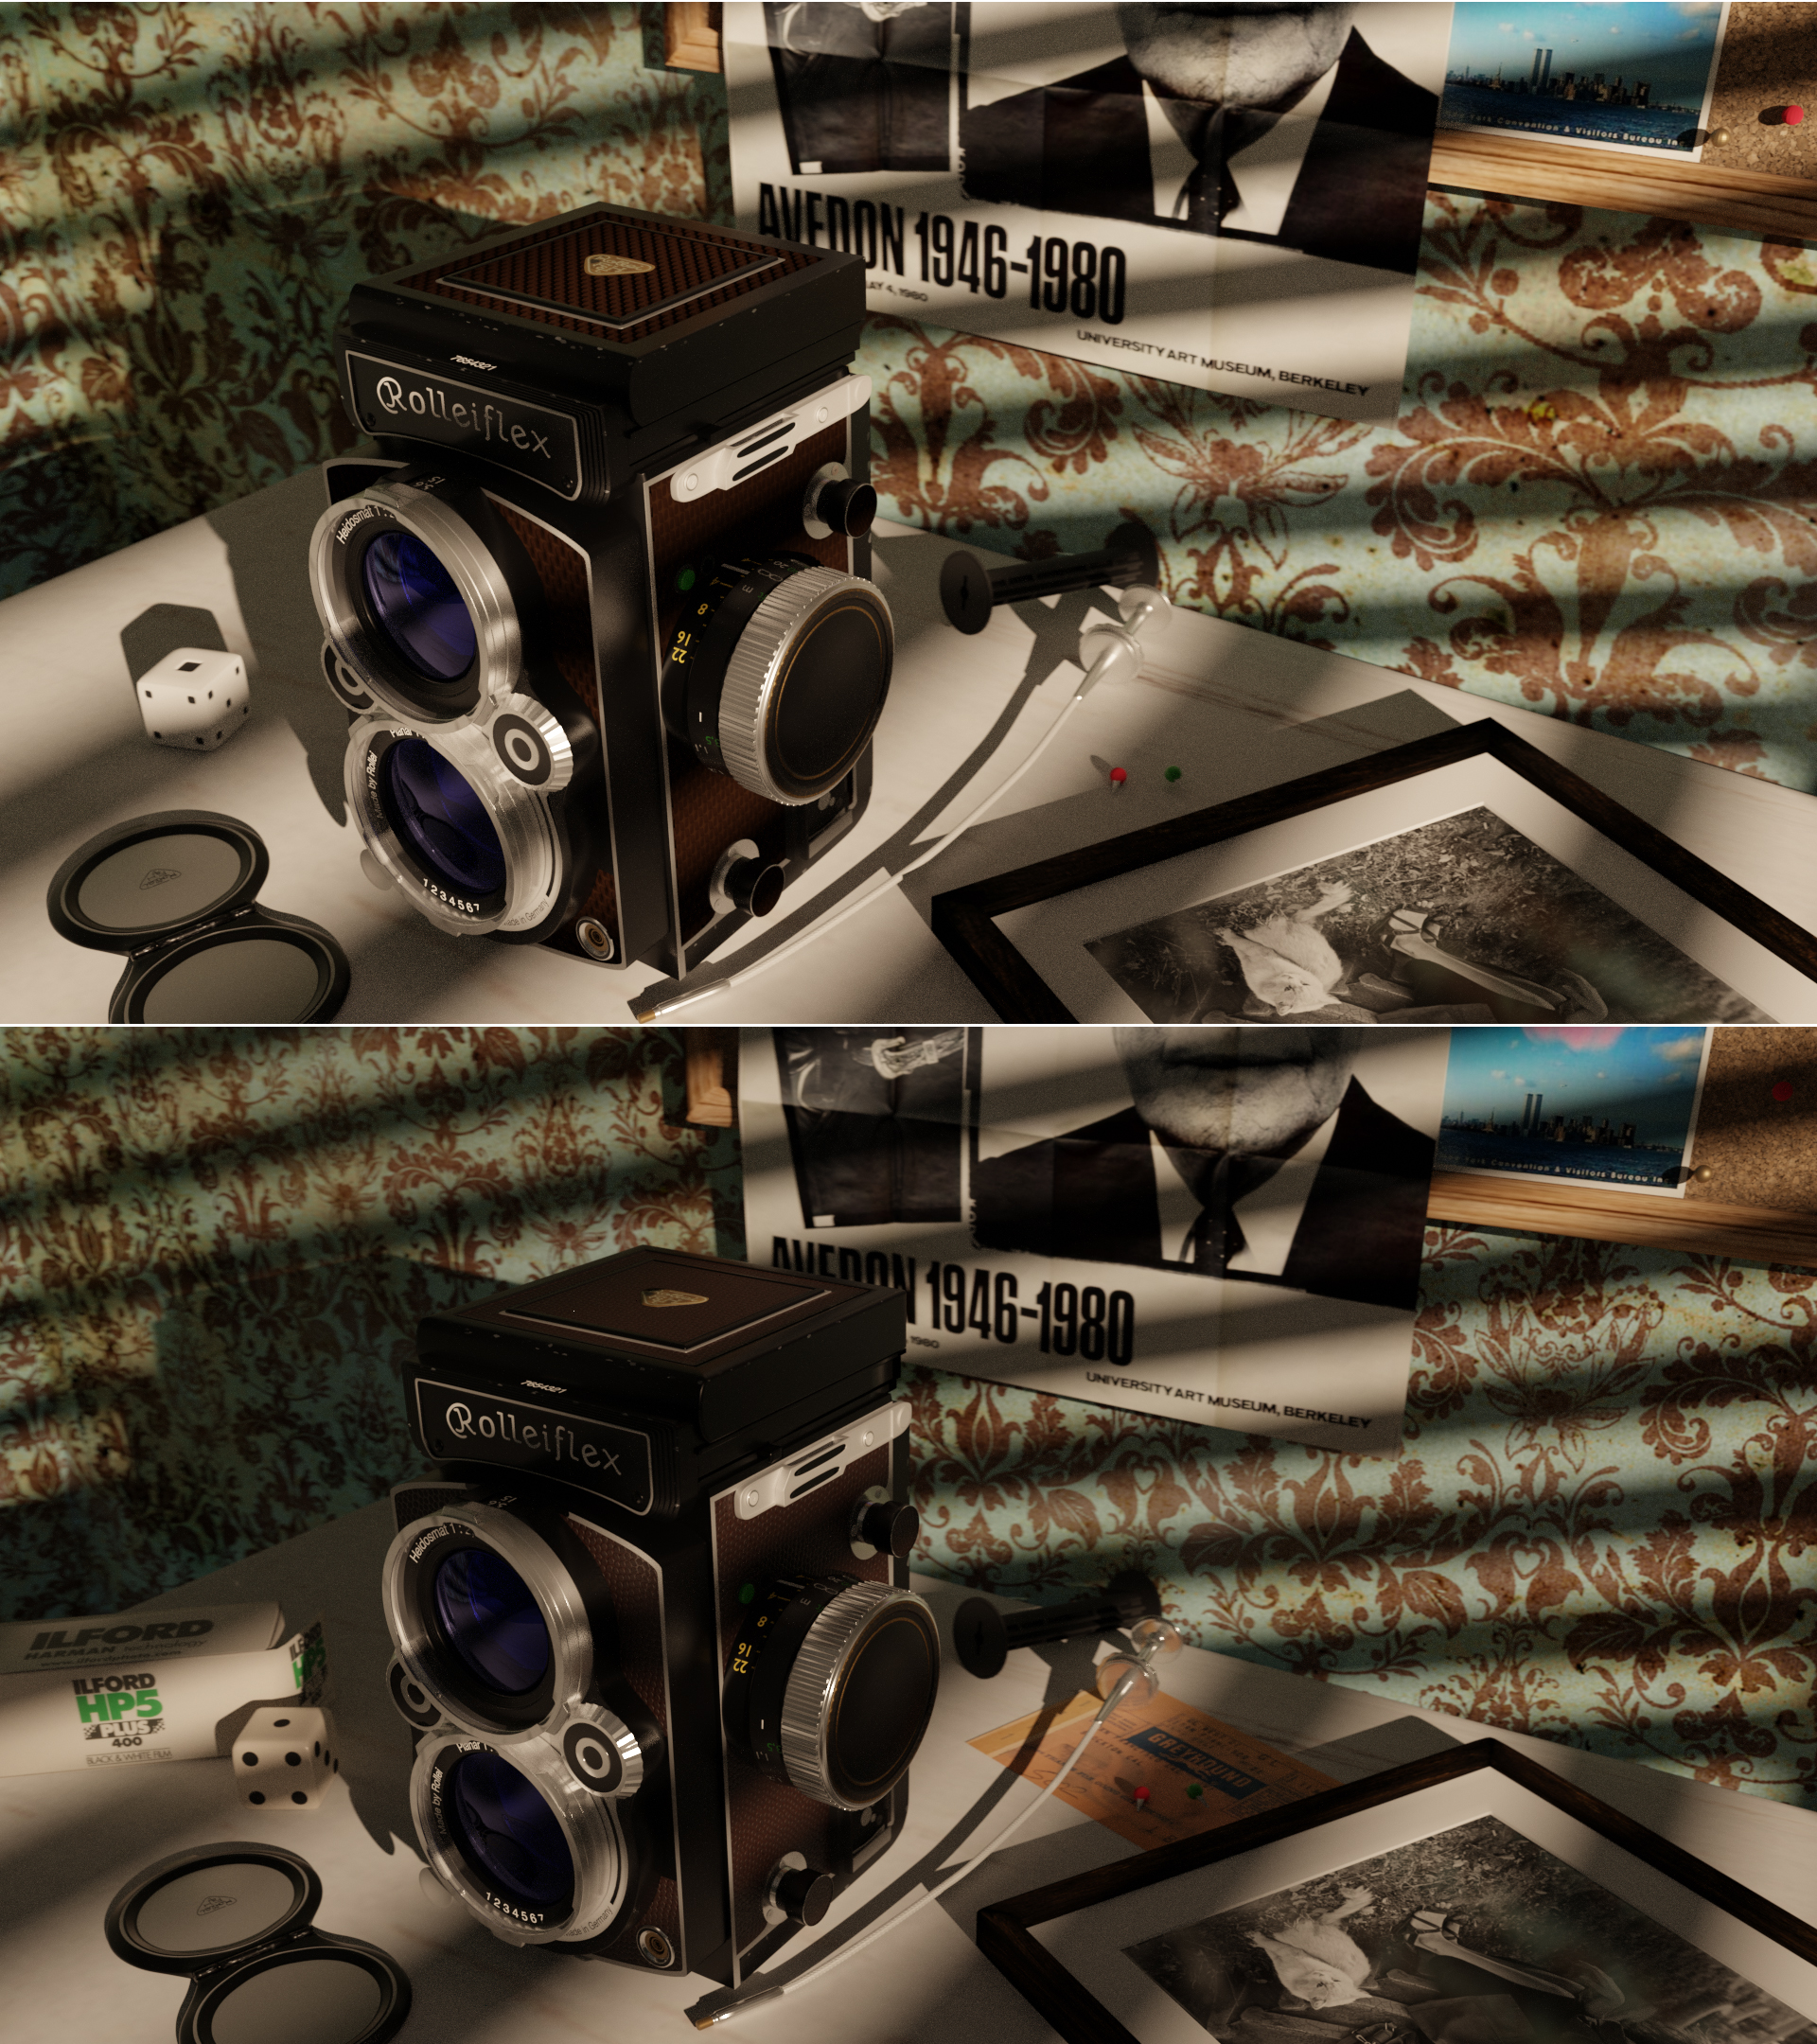
The top image looks good, but I made a mistake with the wallpaper (the pattern is too big and pixelated). Also, I decided to change the color of the die to make it look older. I added a film box to fill the gap on the left side of the picture. I’m proud that I used Greyhound tickets because they are a well-known aspect of American culture, like Richard Avedon and New York’s Twin Towers.
In the end, I have a picture with some significant details. I want to give enough information to a viewer and hope that they can construct their own story, something from the “golden age” of analog photography.
BY ABBY CRAWFORD/Blender
熱門頭條新聞
- Chinese Animation Embarks on Multimodal Globalization, Oriental Aesthetics & AI Tech Power Chinese Culture’s Global Journey
- Sensor Tower Releases H1 2026 Global Mobile Game Publisher Revenue Ranking; 3 Chinese Firms Secure Top 10 Spots & Account for Nearly Half of Total Top-Tier Revenue
- gamescom 2026 Theme: “Games Spark Excitement for the Future”
- 20 Dance Street – A Premium Paris Opera Ballet Adventure from the producers of Find Me in Paris
- Finals of the 2nd NVIDIA DGX Spark Hackathon to Be Held in Shanghai, Exploring New Frontiers of Intelligent Creation with Multimodal AI Agents
- MAF 2026 Calls for Submissions Across Three Streams
- Unity Unveils Cross-Engine PolySpatial Integration for Fortnite & Next-Gen Unity 7 at Unite Seoul 2026
- gamescom reaches new milestone: all available areas for 2026 booked up