Behind the Scenes: R2D2 and C3PO 6

About
My name is Christian Egami, and I’m currently living in Osaka, Japan. In 2004, I started my studies with 3ds Max 6 in an Authorized School from Discreet (Actual Autodesk). In 2011, I had my first experience with Blender when I studied online with the talented teachers from 3DBuzz. I have been working as a 3D generalist for product design, TV, AR, and VR.
I made this model to focus on learning Blender better and to challenge myself.
Inspiration
I think the Star Wars universe is a source of inspiration for many generations and modeling the characters brings back memories from my childhood.
Tools
I used Blender for the C3PO modeling and render, Fusion360 for the R2D2 model, and Substance Painter for some textures.
References
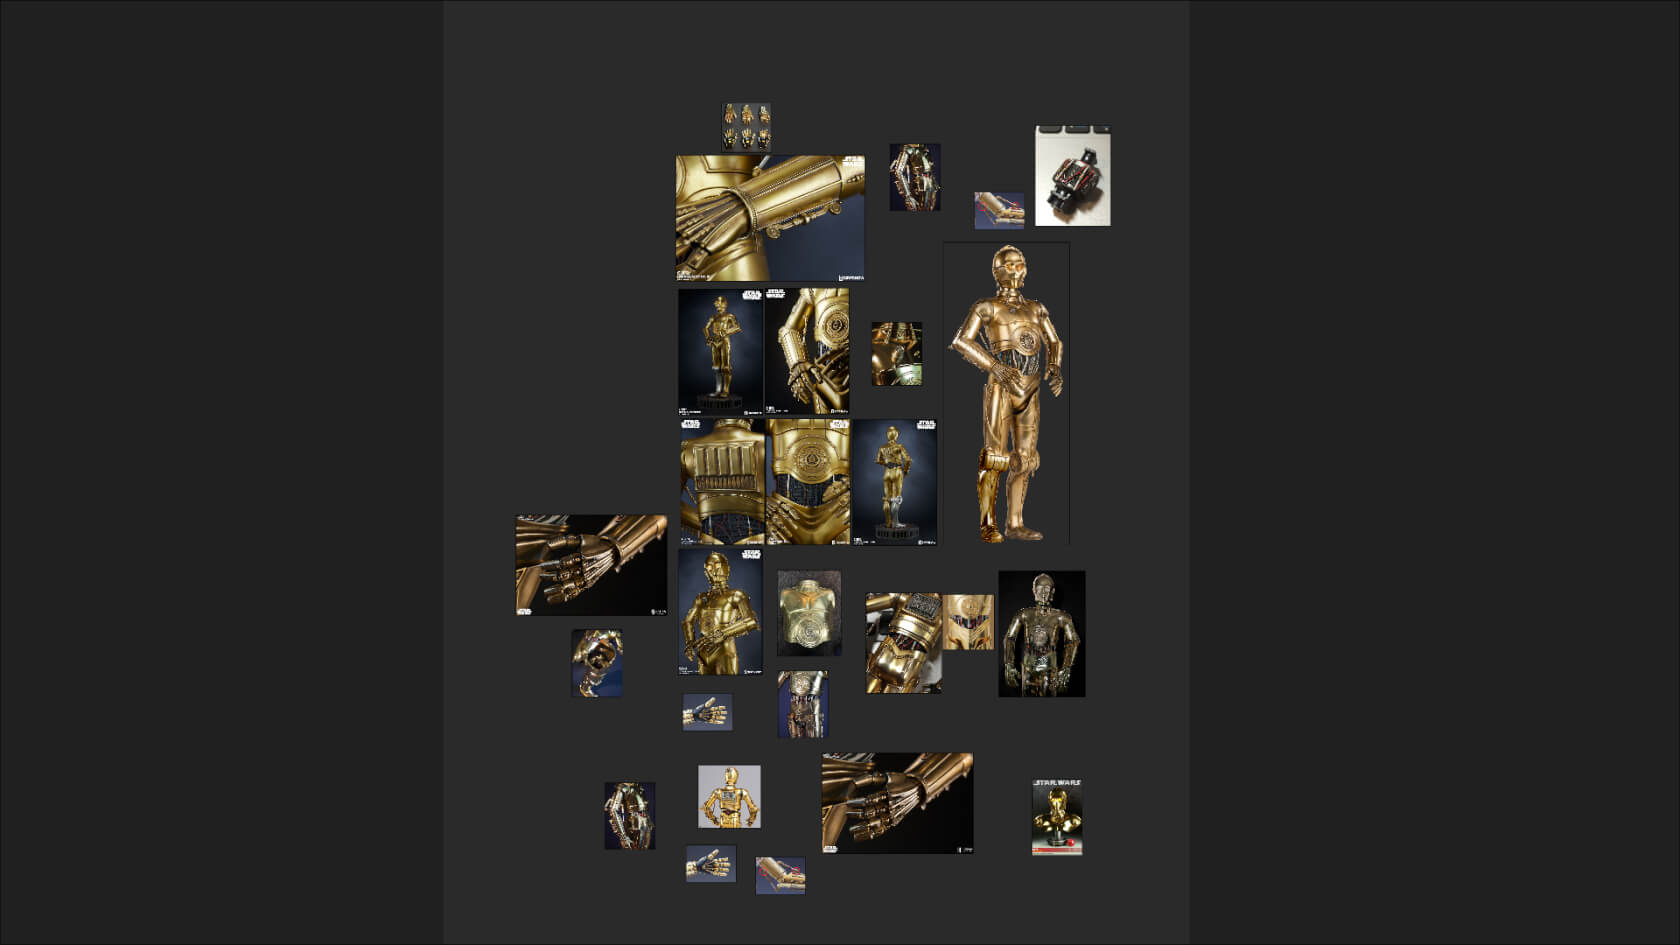
I searched many C3PO references on the internet; the design aspects of the model vary from time to time and I had to decide which one I would use for my modeling process.
Modeling
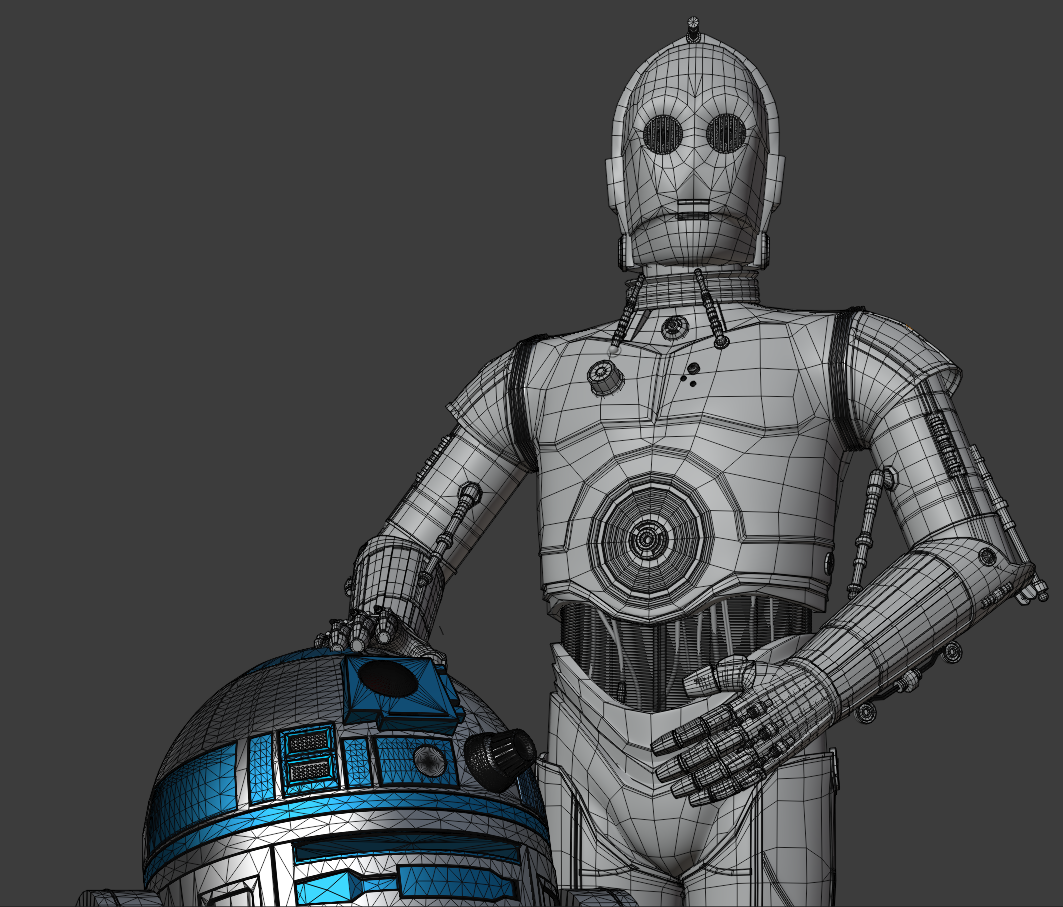
At the beginning, I was focusing more on modeling just C3PO’s bust, but I changed my mind and decided to make a final render together with the R2D2 model I created in Fusion360.
The C3PO model started with the head. I used a blueprint of the head and worked on orthographic views. Poly by poly was my best way to achieve the edge loops I wanted for the model and to create a solid structure for the high-poly mesh.
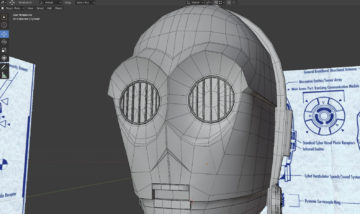
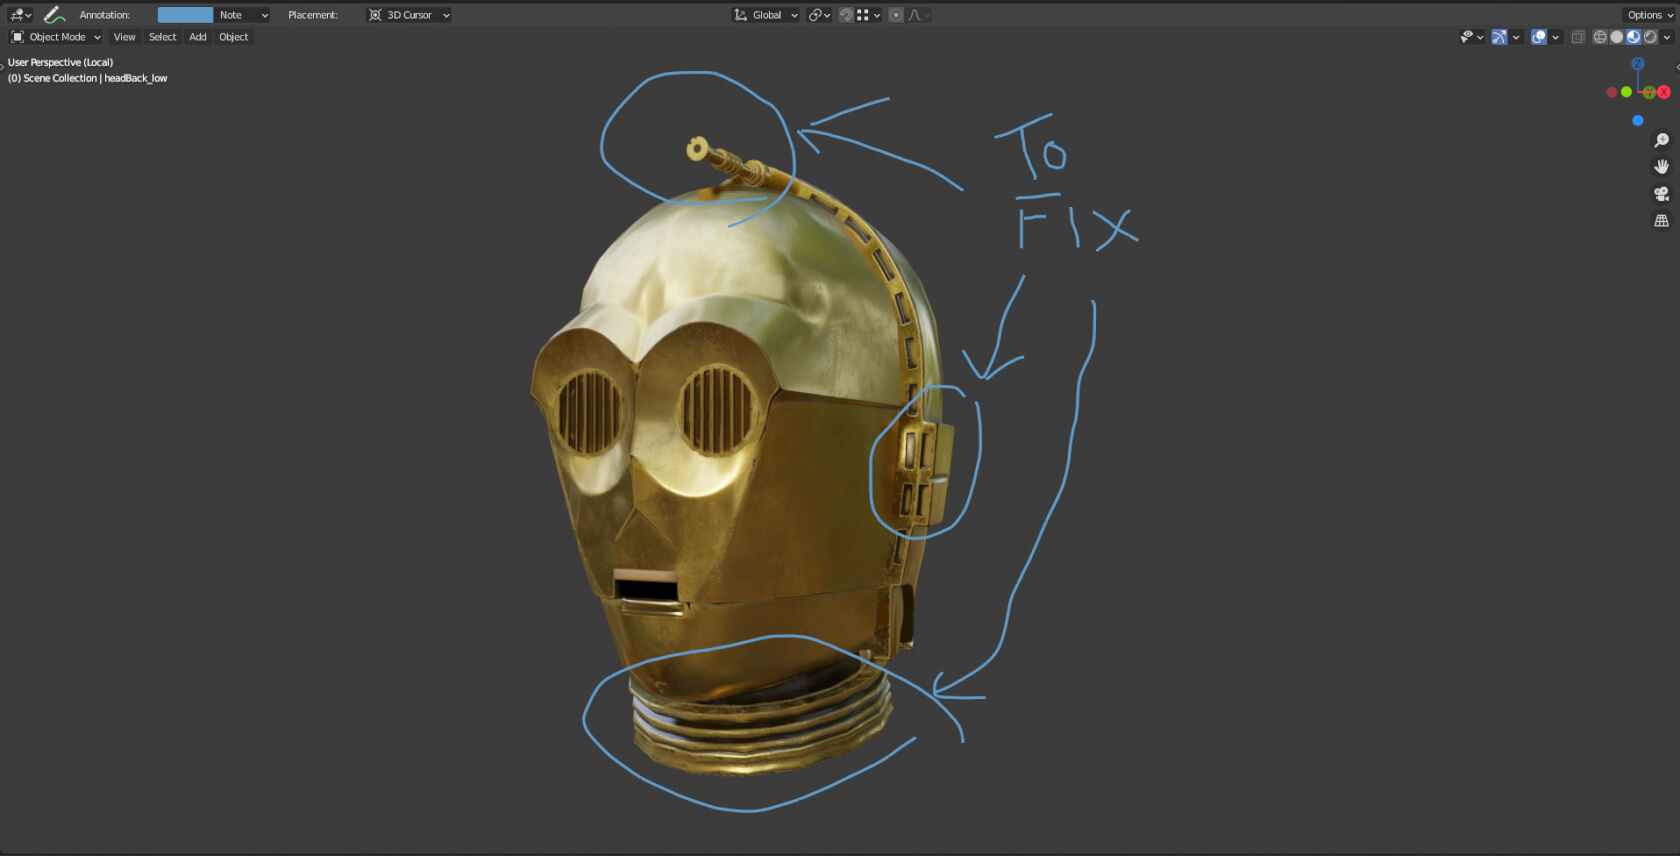
The “annotate” tool is a very useful tool because I can write on the places I have to fix and continue to work on them the next day after looking at my memos.
For the body, I had to make more artistic decisions about shapes.
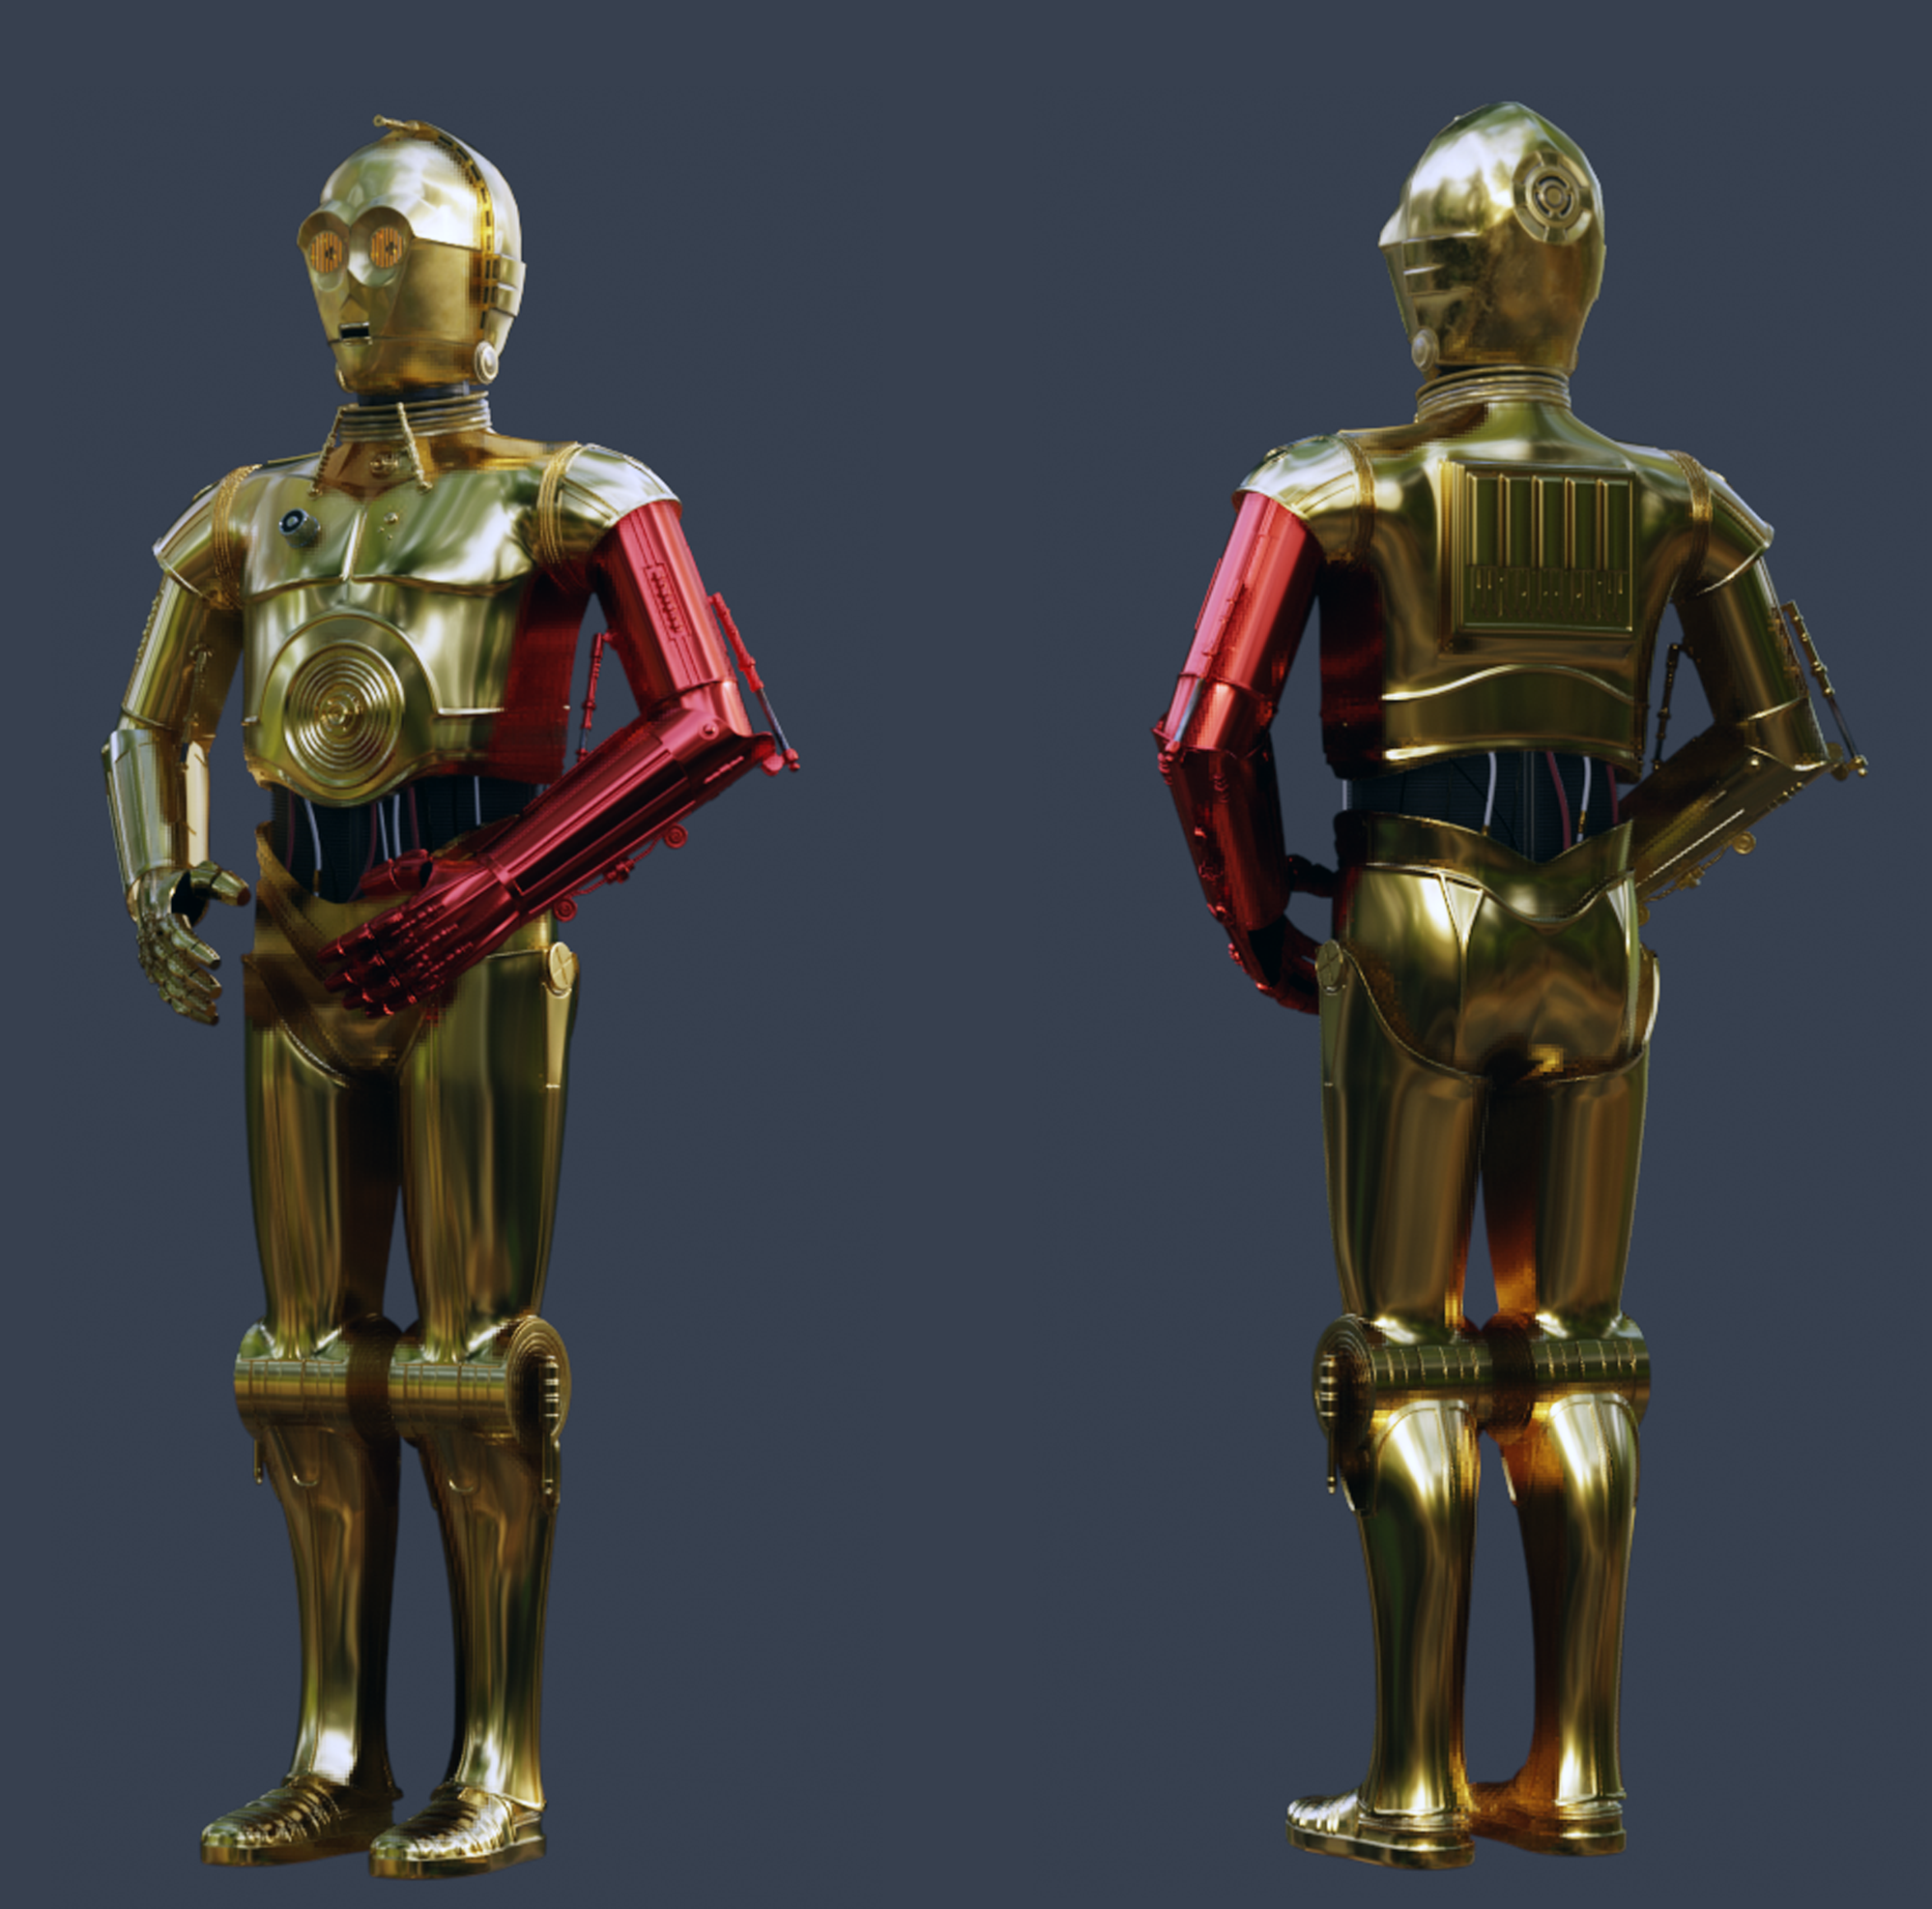
Because C3PO is composed of many parts, in order to just focus on one part at a time, I created a file for each part and assembled everything in one “ASSEMBLY” file. I love Blender CTRL + C and CTRL + V.
Texturing
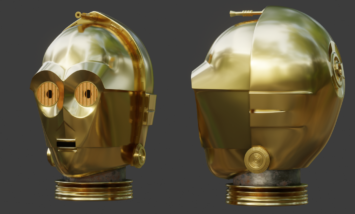
For the texture, I used Substance Painter with the plugin Substance Live Link from Xolotl Studio.

Rendering
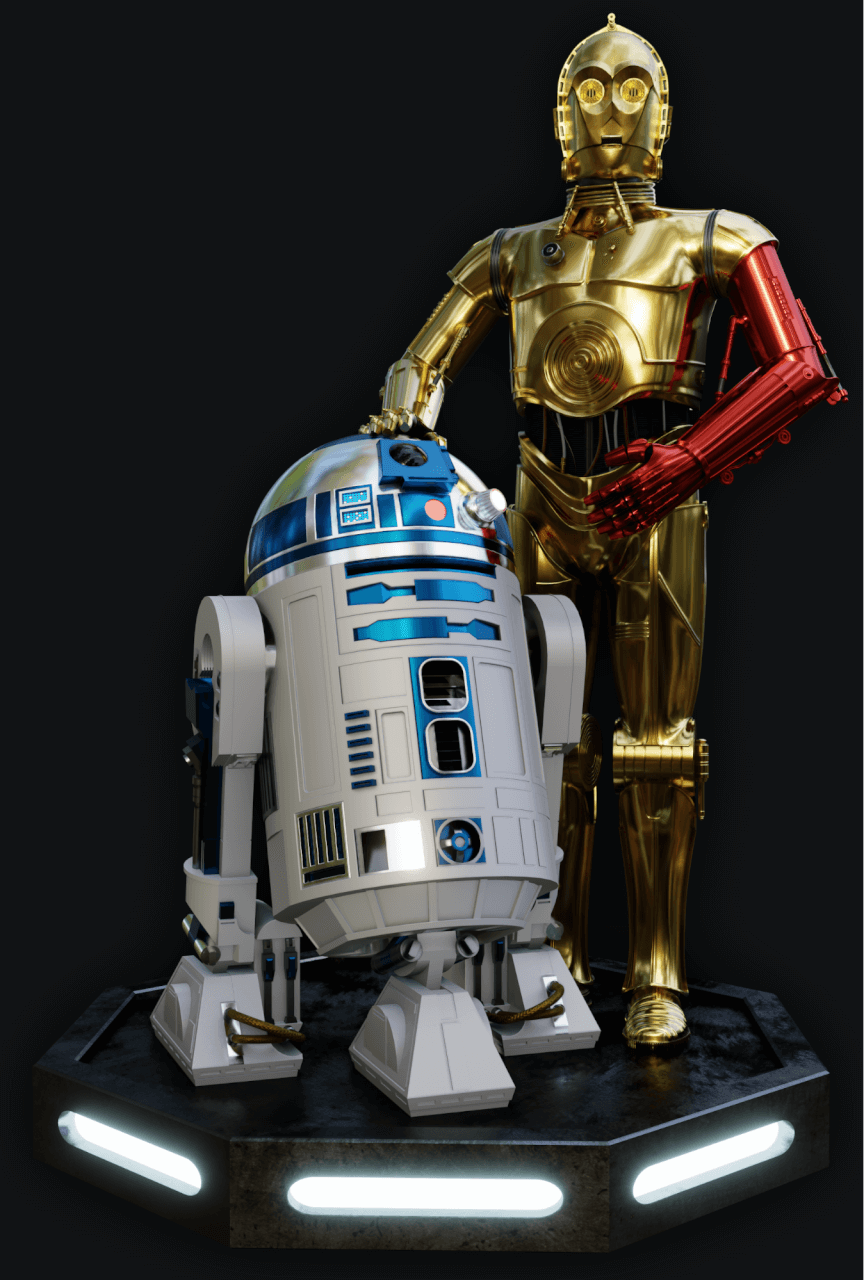
For the render, I used EEVEE. The HDRI is from Blender’s default library and to keep the consistency between Material Preview Mode and Render Preview Mode, I had to connect the HDRI from the folder “C:\Program Files\Blender Foundation\Blender 2.9x\2.9x\datafiles\studiolights\world” to the World Properties.
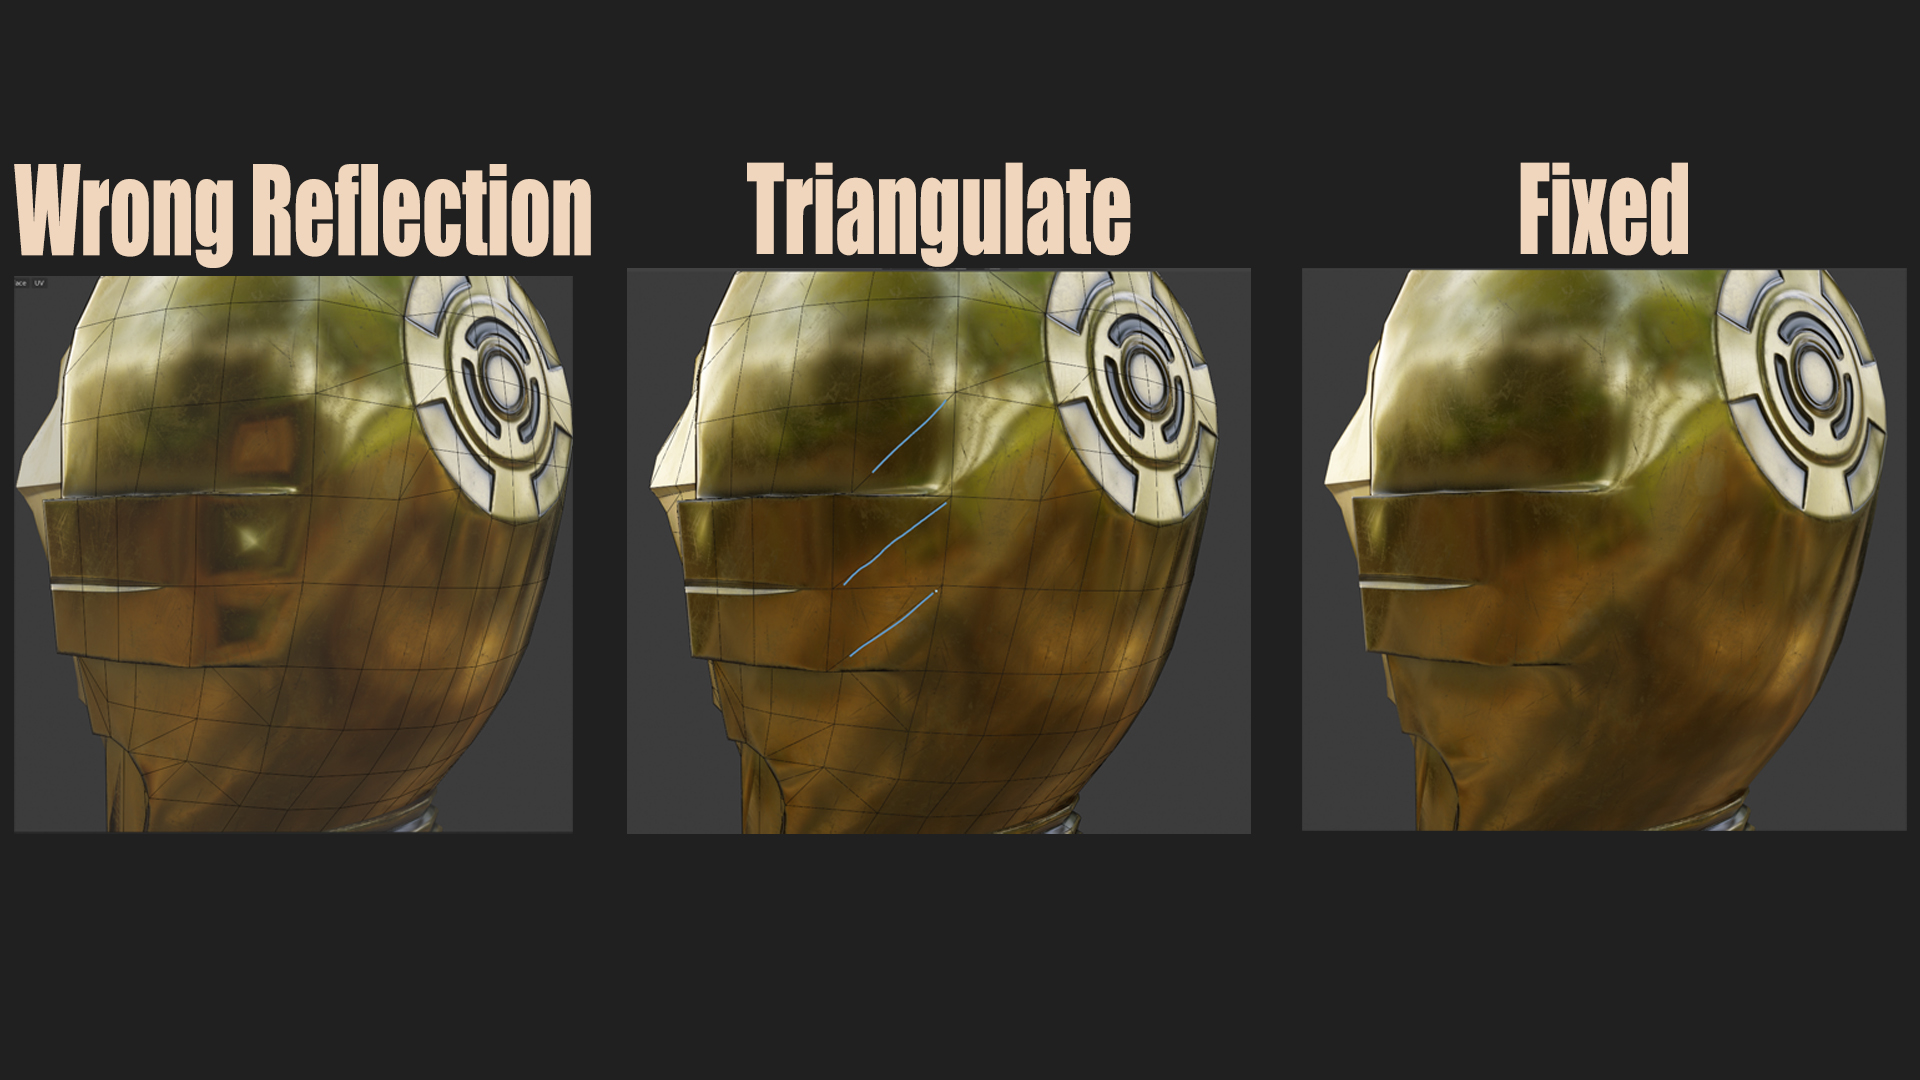
I had some issues with the reflection after connecting the baked texture on the model and to fix that I had to triangulate the polygon in order to guide the shader in the right direction.
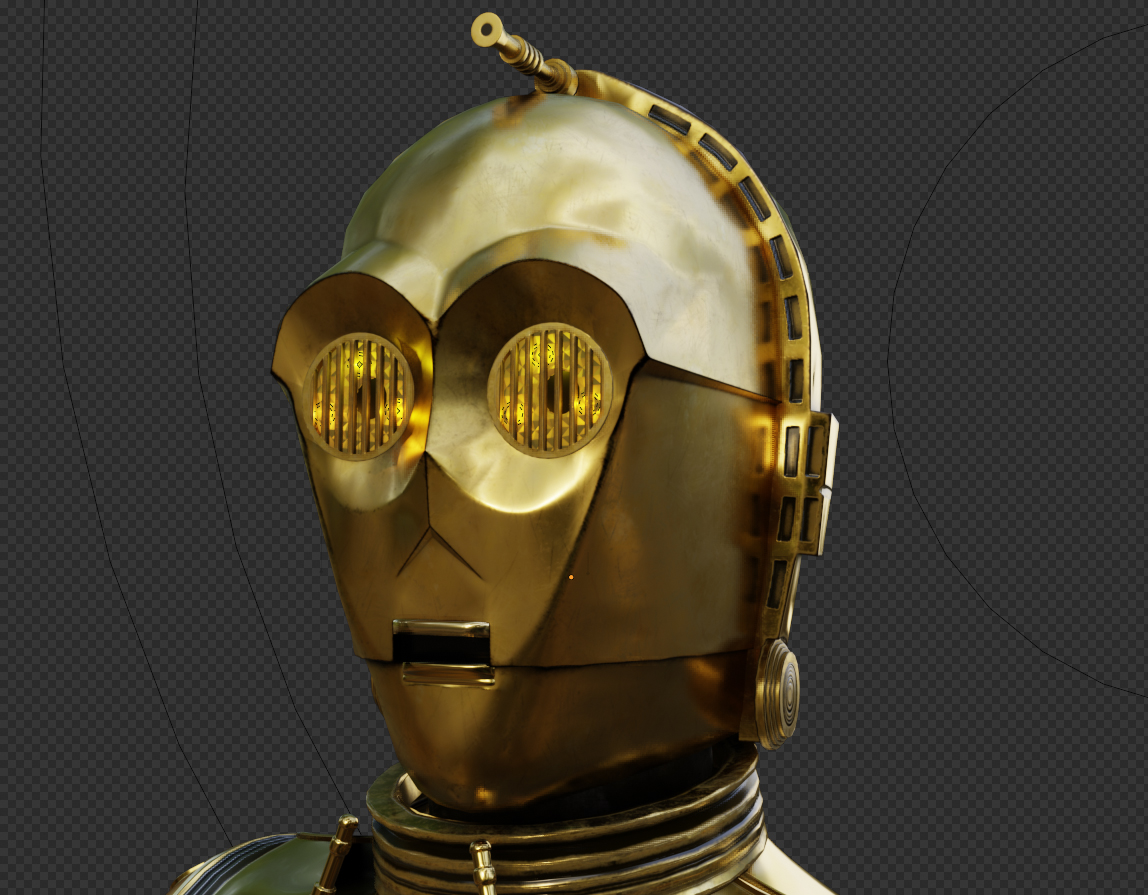
For the eyes of C3PO, I created six small point lights, three on each eye.
Final composition
And for the final image, I imported the R2D2 model from Fusion360 as FBX. I set up some basic lights (Sun and Area lights) and posed the characters.
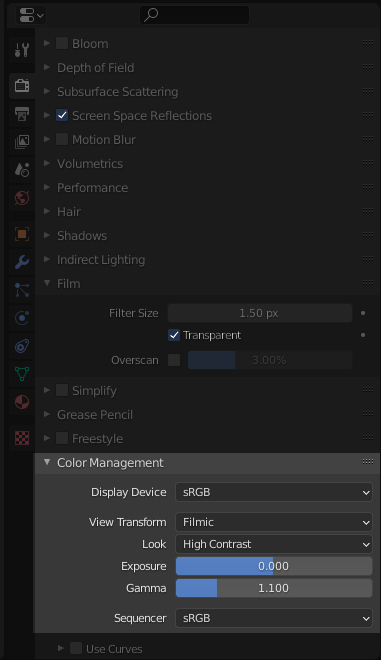
To achieve a better quality render, I played with the contrast option on Color Management (Render Properties > Color Management > Look):
That’s it! Hope you enjoyed this Behind the Scenes and thanks to BlenderNation and the Blender Community for this opportunity.
BY ABBY CRAWFORD
熱門頭條新聞
- FenZ Interactive’s Non-Human Lands in Jingdezhen Ceramic Trend Toy Industry, IP Licensing Forges New Integration Model for Chinese Comics & Traditional Culture
- Generative AI Reaches 100% Adoption Across Japan’s Online Gaming Industry; Operational Efficiency Boost Clashes With Player Concerns Over Copyright & Homogenization
- 35 Years of Long-Awaited Adaptation! Classic Isekai Shojo Manga Kanata Kara (From Afar) TV Anime Premieres This October, Original Author Fully Supervises For Fans’ Dream Come True
- Asia’s Top Indie Game Broadcast INDIE Live Expo 2026.12.1 Scheduled for December 1; Sponsorship & Game Submissions Now Open
- Groundbreaking Tech Innovation Redefines Post-Apocalyptic Combat – Gears of War: E-Day Launches Oct 6 with Native DLSS 4.5 & Full Ray Tracing Pipeline Powered by Unreal Engine 5
- VR Action Platformer Hyperstacks Launches on Steam July 30th After 8 Years of Development
- Disney Completes Third Wave of Mass Layoffs; Cost Restructuring Reshapes Business Strategy & Triggers Structural Changes Across Global Entertainment Industry
- Final Fantasy VII: Ever Crisis to Cease Global Operations This October: Root Causes, Player Impacts and Strategic Adjustments for Square Enix Mobile Business