WHATS NEW IN THE RIZOMUV SPRING 2020 RELEASE?
We’re fortunate to have a community which keeps working with us to improve RizomUV. As well as algorithm improvements, here are the new features implemented since the Winter release from November 2019:
TEXEL DENSITY WORKFLOW OVERHAUL

We have made using Texel Density (TD) in RizomUV significantly easier by tweaking the UI and how it works. You can find the functionality, complete with shiny new icons, in the Layout and Packaging panels as always, but the workflow is now a little different: Texel Density is now one, linked setting, as opposed to separate in earlier versions. So Texel Density in the Packing Panel is now linked to the Layout Texel Density by default. However, should you need to set TD settings in the Packing panel, you can be unlink them from the Layout Panel by pressing the Custom button and then defining your TD.
TEXEL DENSITY IN THE LAYOUT PANEL
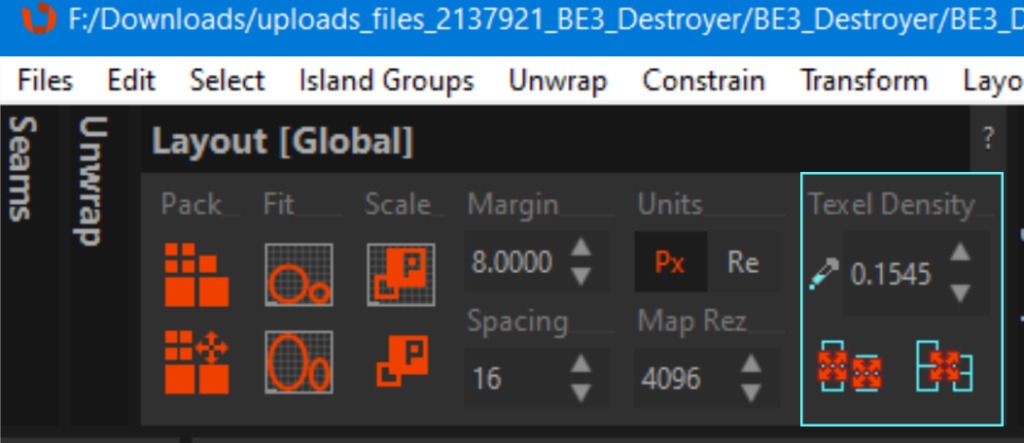
- In the layout panel, we now have a Texel Density picker as well as letting you add your values manually in the spinner.
- Using the pickers in both panels will let you pick TD from selected islands, If nothing is picked, it will select and calculate the average density for all islands
- Pressing the new Apply Texel Density icon (Shift+Q) will apply your defined or selected TD onto selected Islands
- Pressing the Apply Density Uniformly will apply a calculated average density across all (selected) islands
TEXEL DENSITY IN THE PACKINGPANEL
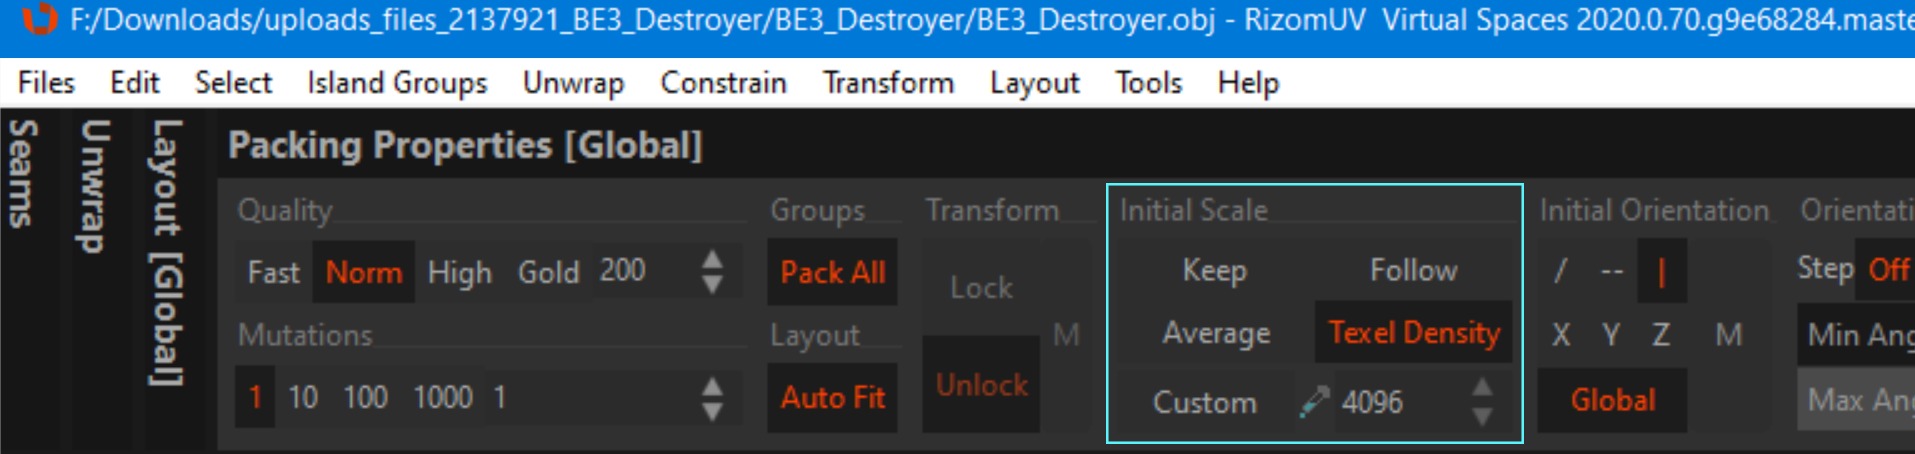
We have kept Keep and Average as they were, but we made the following changes to the workflow:
- Pressing Texel Density now matches the specified TD in the Layout Panel. It’s important to note that you need to turn off Autofit when using this option, as Autofit will override this setting and scale the islands to make the islands fit the UV tile(s) according to the Autofit and not the TD algorithm
- Pressing Custom, lets you pick or define a Custom Texel Density for Packing rather than using the Texel Density specified in the Layout Panel.
- Using Follow sets Packing to follow the average TD of non-selected and non-locked islands. As with the other settings, you need to turn off Autofit, so it won’t override scaling when packing.
SELECT ELEMENT
Select Element works just like it does in, i.e. 3DS Max: you select the Element, and then you can, i.e. press I to isolate and unwrap it. The Element selection remains regardless of UVs, so you can always select it for further refinement or packaging. In the video below, we enter Island mode (F4) but you can use Polygon Mode (F3) as well. We then Selected an island of an Element. Then we pressed the Middle Mouse Buttom (MMB) but you can also use the icon in the top right of the align panel
SELECT FLIPPED
Select Flipped does precisely what it says, it selects all flipped islands or polygons in a model or isolated group if you pressed I to separate something out. Rizom interprets Flipped components as downfacing in UV space. To select them, you press the icon and hey, presto!

Once the islands or polys are selected, you can use any of the flip options in the flip menu, or you can press U to unwrap them if they are existing islands, that will also flip them the right way in many cases
DISTRIBUTE SPACE
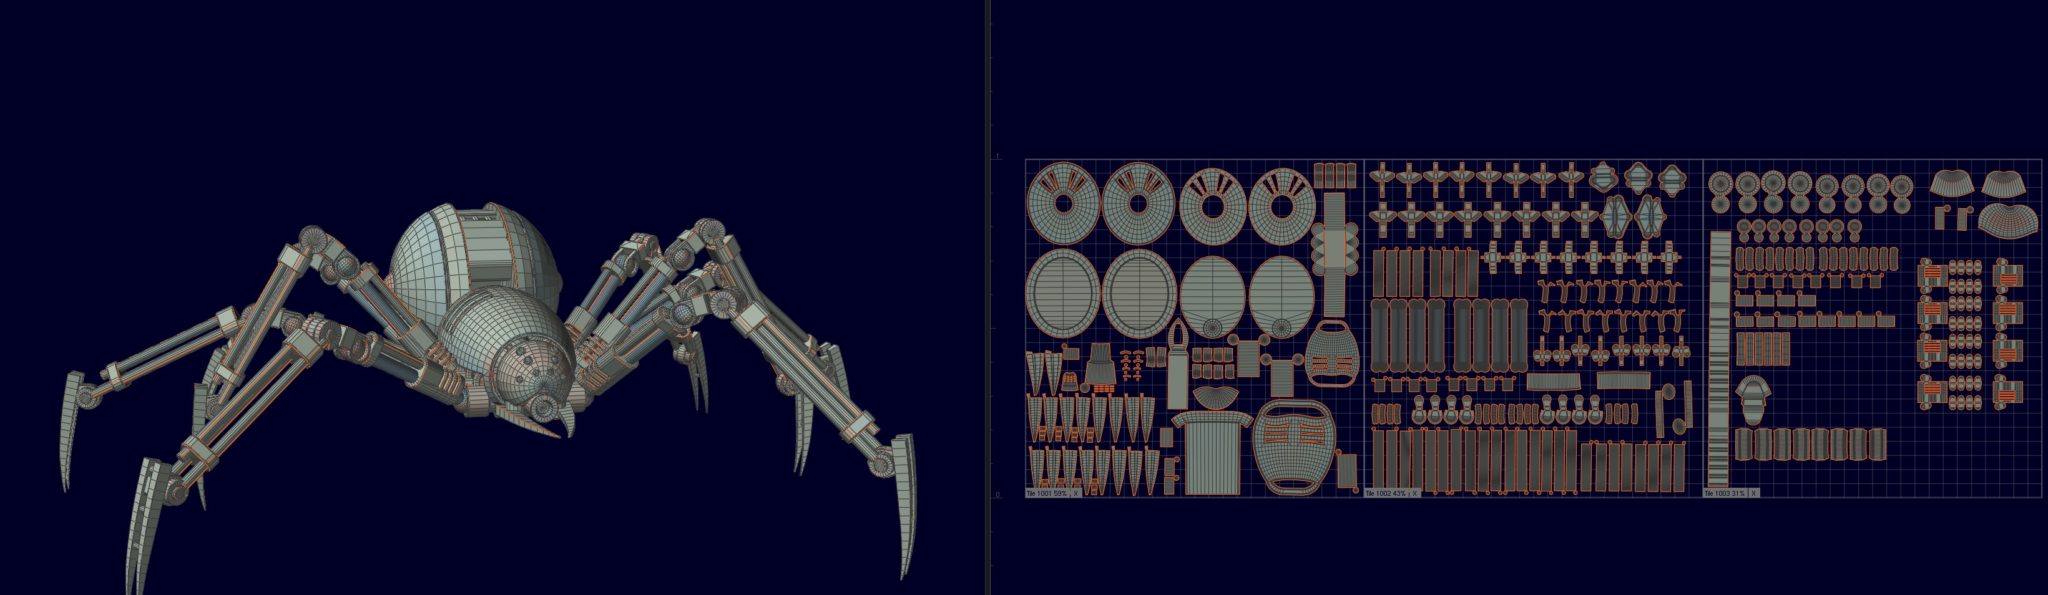
After doing the spider OCD UVs by hand using the Align tools in RizomUV 2019 we decided to implement something similar to Photoshop’s Align/Distribute function as well. Here is how it works:
- In the Align/straighten/flip etc. menu in the lower right, you’ll find the new settings. You can distribute horizontally and vertically, and select an average, pixel, or real space for distribution
- You can distribute per average space available, which disables the spinner.
- Selecting Pixel space and defining the value in the spinner distributes your selection(s) according to that value. So if you set the spinner to 5 pixels, there will be 5 pixels between the selections
- Selecting Real Space and setting the value in the spinner distributes your selections according to that value. So if you set the spinner to 5 Real Space Units, there will be 5 real UV units between the selections
- You can use this function on islands (F4), polys (F3) and edges (F2) .Vertices(F1).
- The Group switch specifies if the primitives must be moved as solid groups or independently.
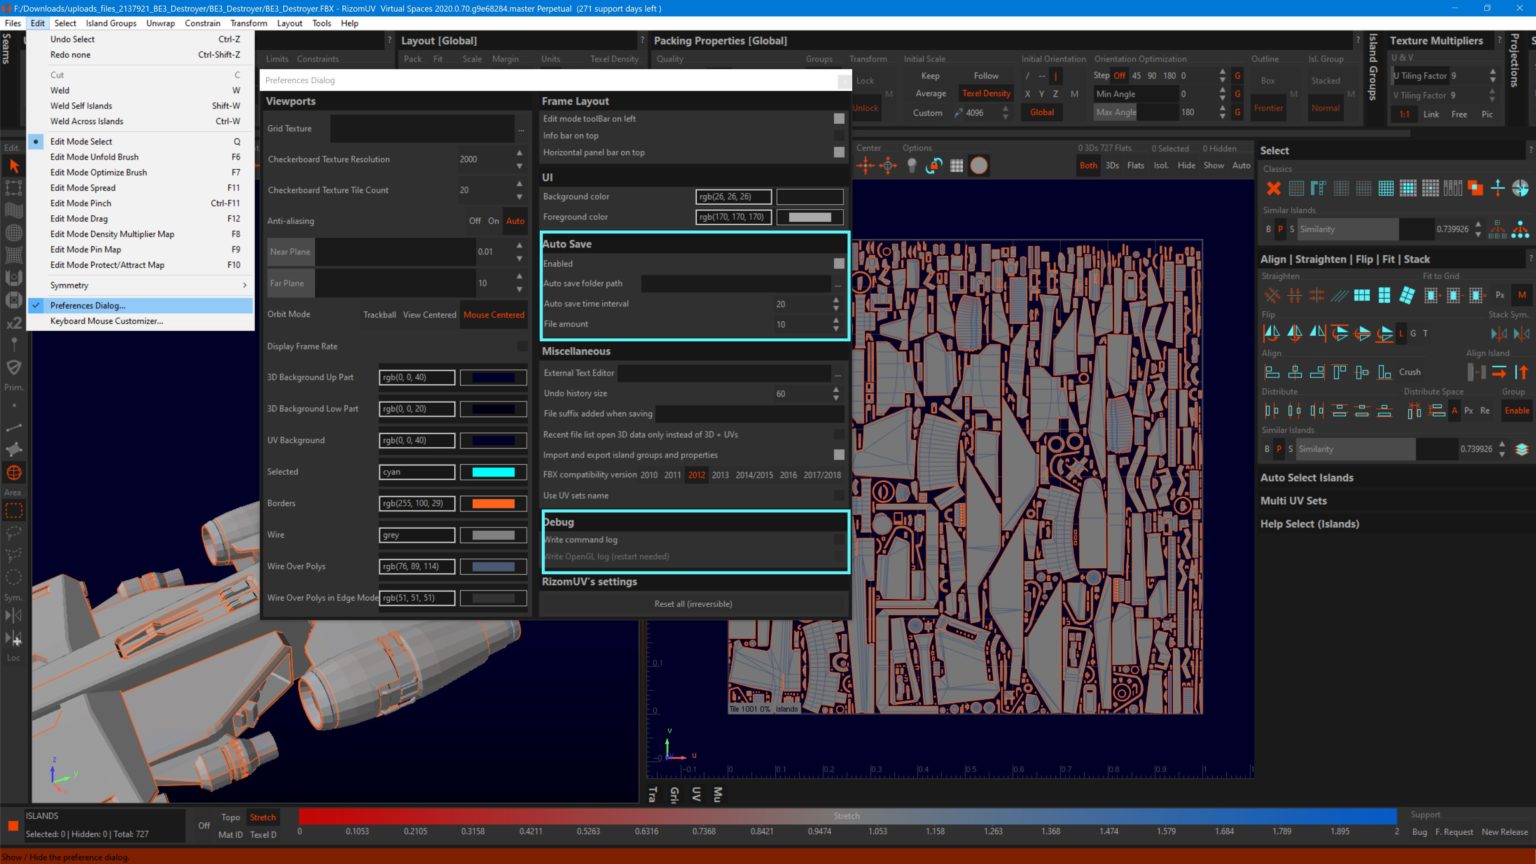
AUTOSAVE AND DEBUG LOGS
Located in Edit_>Preferences, RizomUV now has Autosave and Debug options. Autosave is off by default, but when you set it to on, it will save in a location of your choice (the default being RizomUV’s autosave folder in
C:\Users\YOURUSERNAME\AppData\Roaming\RizomUV at intervals of your choice, and you can define up to five (5)autosaves. You can of course change the location of your autosave
Found in the same location, the Debug log for RizomUV comes in two flavours: The Command log outputs how RizomUV initialises and the commands used in the current RizomUV session you are running. The OpenGL log outputs what OpenGL is doing during your session.
Both will hopefully make troubleshooting even easier, and we urge people to add the command logs when reporting a problem at support.rizom-lab.com.
EDGE ALIGNMENT ENHANCEMENTS
RizomUV now has an option to keep constrained edges aligned when unwrapping or optimising. It can now also create a hinge from a vertex, meaning the alignment will “bend” based on the position of the vertex. Please note you have to be in Vertex mode for this (F1). It’s kind of like how you insert an extra point in a Marvelous Designer pattern and bend it straight from there.
In addition, based on a user request, we have implemented an Edge Selection Stop featurette, where Edge Selection stops selecting edges when it meets an already selected edge
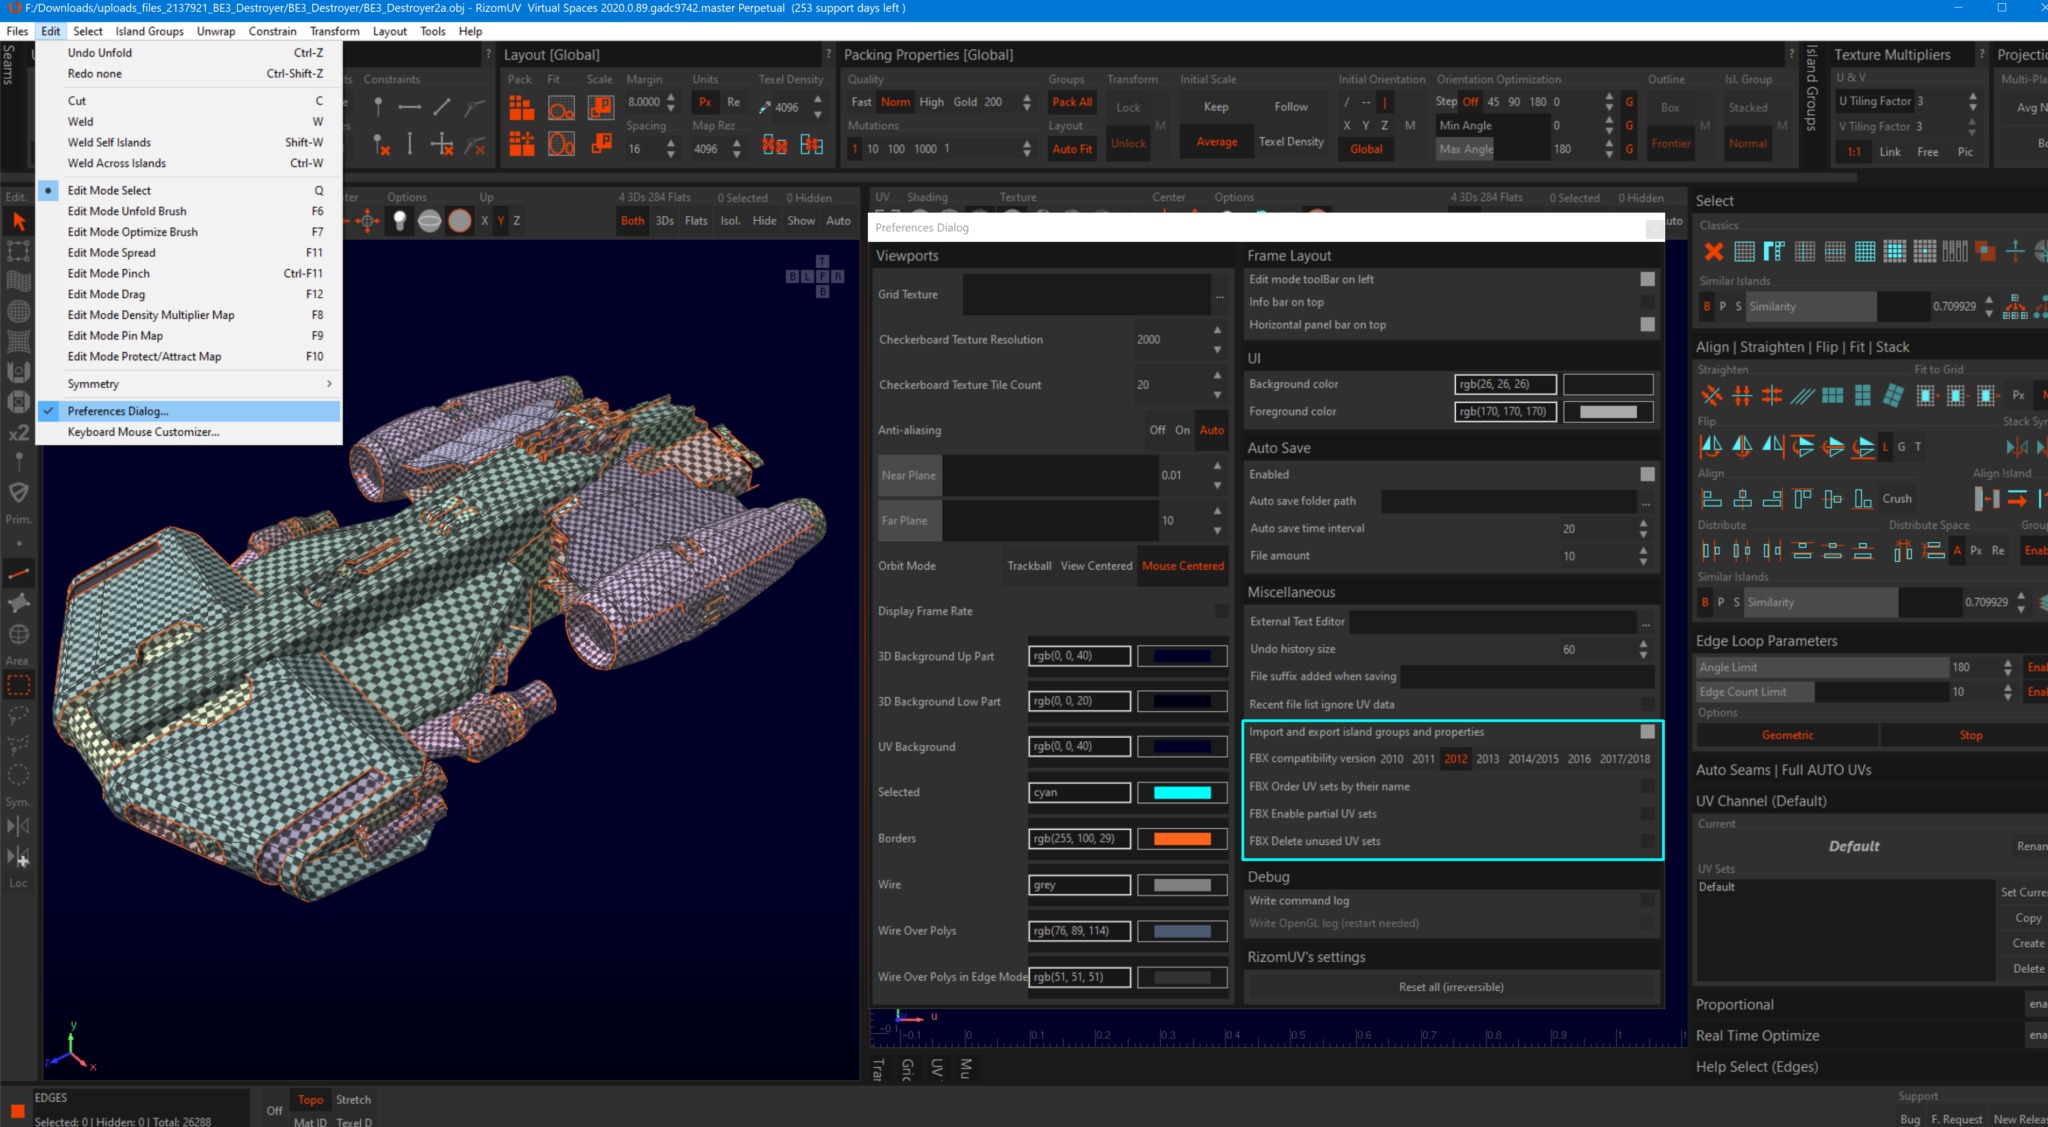
FBX ENHANCEMENTS
Wwe’ve also given FBX loading some enhancements:
Located in Preferences, you can now choose how RizomUV handles FBX imports and their channels:
You can now enable partial FBX UV sets as well as deleteunused UV sets
In addition, the UV Map names are now displayed even if the FBX file is loaded in its default channel index mode. We added this, as all modelers handle what’s in the FBX channels differently, and we hope this makes it easier to work with them in RizomUV
Source:Rizom-lab
Hot News
- Reinventing Chinese Mythology: Animated Comedy All Wishes Come True Hits Theaters Nationwide on July 18, Poised to Dominate Summer Box Office
- Silex Films Brings Acclaimed Graphic Novel In Waves to the Big Screen as an Animated Feature
- Meet the HEJ Collective – Hungary’s new indie game label launching its first season
- UK CMA Launches Consultation on Mandatory Anti-Steering Reforms, Disrupting Apple and Google’s App Store Commission Business Model
- ARK: SURVIVAL ASCENDED EXPANDS TO THE SEA AND SKY WITH TIDES OF FORTUNE & SURPRISE DRAGONTOPIA DROP!
- miHoYo Launches AI Desktop Companion App BSide: Olivia Lin on Steam Early Access;
- AI SBoom or Bubble? AI-Generated Games & Films Flood Steam, Pitting Industry Insiders in an Ultimate Standoff Between Low Costs and High Quality
- Stable Game License Approvals & Leading Publishers’ Strategic Roadmap Reshape China’s Gaming Industry